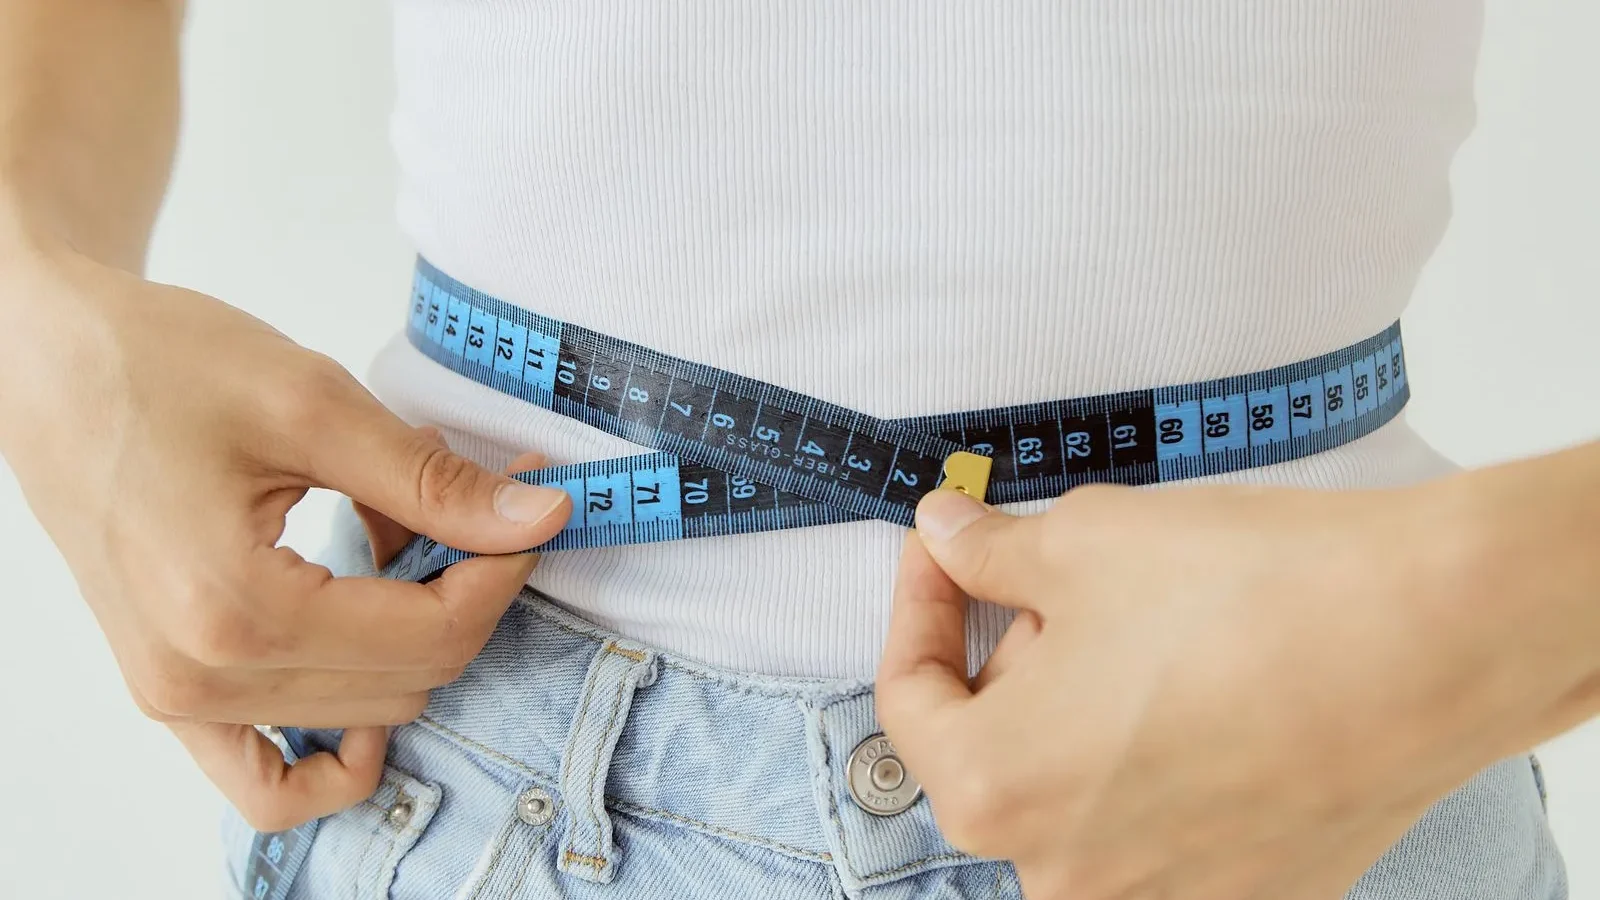
To take body measurements, use a flexible tape measure, stand relaxed in front of a mirror, keep the tape level and snug without pressing into your skin, and measure the same spots at the same time of day every time. For your waist, the NHLBI method is to measure just above your hipbones, just after you breathe out.
This guide walks you through each site step by step: waist, hips, chest, upper arms and thighs. It also covers how to get readings you can trust, what the numbers mean, and how to take progress photos you can actually compare.
Measurements are worth the five minutes because they show changes the scale can miss, such as a smaller waist while your weight holds steady.
Why measure your body, not just your weight
Your weight and BMI don’t show where you carry fat. The CDC notes that BMI doesn’t distinguish fat from muscle and bone, and doesn’t indicate where in the body fat is carried.
Your waist helps fill that gap. A 2020 consensus statement from an international working group on visceral obesity concluded that waist circumference adds information to BMI for predicting health risks, and recommended that clinicians measure it routinely.
It also picks up progress the scale can hide. The same statement notes that reductions in waist size from exercise or diet are seen with or without weight loss.
What you need before you start
- A flexible, non-stretch tape measure. A cloth or fiberglass sewing-style tape works; a metal tape from the toolbox doesn’t.
- A mirror, so you can check that the tape is level all the way around.
- A way to record results, such as a notebook, a phone note or a spreadsheet.
- Bare skin or thin, close-fitting clothing, the same each time.
- A helper (optional), which makes hips, upper arms and photos easier.
Pick a consistent time, such as first thing in the morning before eating, and measure in the same order each session. A tape with a locking or self-retracting end can make measuring yourself easier.
How to measure your waist
Your waist is the most useful measurement for health, so it’s worth getting right. These steps follow the NHLBI’s home method and the procedure in the CDC’s National Health and Nutrition Examination Survey (NHANES) manual.
- Stand upright and relaxed, with your weight evenly on both feet.
- Find the top of your hipbones by pressing your fingers into your sides and feeling for the upper edge of your pelvis.
- Wrap the tape around your middle just above the top of your hipbones.
- Check in the mirror that the tape is level, parallel to the floor, all the way around, including across your back.
- Make the tape snug without pressing into your skin.
- Breathe normally and read the tape just after a normal breath out. Don’t suck in your stomach.
- Write down the number, to the nearest quarter inch or half centimeter.
How to measure hips, chest, arms and thighs
These sites are mainly for tracking your own changes over time. Consistency matters more than finding the “perfect” spot.
Hips
Stand with your feet together and turn side-on to the mirror. Wrap the tape around the widest part of your buttocks, the point that sticks out most when you look at yourself in profile. This is the landmark the NHANES manual uses. Keep the tape level and snug.
Chest
Stand tall with your arms relaxed at your sides. Wrap the tape around the fullest part of your chest, under your armpits and across your shoulder blades, and read it after a normal breath out. If you wear a bra, wear the same kind each time, since different styles can change the reading.
Upper arms
The NHANES manual measures the right arm at the midpoint between the bony tip of the shoulder and the tip of the elbow. To find it, bend your elbow to 90 degrees, measure from the bony point at the top of your shoulder down to the point of your elbow, and mark halfway. A helper makes this much easier.
Then let your arm hang loosely and wrap the tape around it at the mark, at a right angle to your arm. The manual warns that flexing or tightening the arm muscles gives an inaccurate measurement, so keep it relaxed.
Thighs
Stand with your feet about hip-width apart and your weight on both legs. Measure around the fullest part of your upper thigh, or at a set distance above the top of your kneecap, such as 6 inches. Note which method and which leg you used so you can repeat it exactly.
| Site | Where the tape goes | Key tip |
|---|---|---|
| Waist | Just above the top of the hipbones | Read after a normal breath out |
| Hips | Widest part of the buttocks, seen from the side | Feet together; check the tape is level in the mirror |
| Chest | Fullest part, under the armpits | Arms relaxed; same bra or top each time |
| Upper arm | Halfway between shoulder tip and elbow | Arm hanging loose, not flexed; same arm each time |
| Thigh | Fullest part, or a set distance above the kneecap | Weight on both legs; same leg each time |
How to get readings you can trust
- Snug, not tight. The NHANES manual calls for a tape that’s snug but doesn’t compress the skin.
- Level all the way around. A tape that dips at the back gives you a misleading number, so check it in the mirror.
- Relaxed muscles, normal breathing. Don’t pull in your stomach or flex.
- Same side, same order, same time of day.
- Take two readings and average them. If they’re far apart, take a third.
- Same person measuring, if someone helps you.
Measuring yourself is reasonably reliable. According to the 2020 consensus statement, studies comparing self-measured and technician-measured waist sizes found strong agreement, although people tended to underestimate their waist by about 1 to 3 cm, more so at higher body weights.
That’s why consistency matters more than perfection. If you measure the same way each time, a change from one month to the next is meaningful.
What your measurements mean
For health screening, your waist is the number to watch. The NHLBI says a waist of more than 35 inches for women or more than 40 inches for men increases the risk of heart disease and type 2 diabetes.
You can also compare your waist with your height. The NHS advises keeping your waist to less than half your height. A 2012 meta-analysis of 31 studies, covering more than 300,000 adults, found that waist-to-height ratio was modestly better than BMI or waist size alone at flagging risks such as high blood pressure and type 2 diabetes.
Your hip, chest, arm and thigh numbers are most useful for tracking your own changes, for example to see whether your arms are holding steady while your waist comes down. These are screening and tracking tools, not a diagnosis, and they work best alongside your BMI and your doctor’s checks.
How to take progress photos you can compare
Photos capture changes in shape that a tape can miss. They only help if each set is taken the same way.
- Same place and light. Use the same spot, ideally with even light from the front rather than overhead.
- Same camera position. Set your phone on a shelf or tripod at about waist height, mark where you stand, and use the timer.
- Same poses. Take front, side and back views, standing relaxed with your arms slightly away from your body.
- Same clothing that shows your shape, such as fitted shorts and a fitted top.
- Same time of day, ideally right after you measure.
- Every four weeks or so. Daily photos are too close together to show much.
Keep your photos private, for example in a locked album. They’re for your comparison only.
How often to measure, with a sample log
Body measurements change slowly, so every two to four weeks is plenty. Some people like to check their waist weekly; that’s fine as long as you compare trends, not single readings.
Here is an example log with made-up numbers, showing what slow, steady progress can look like.
| Measurement | Week 0 | Week 4 | Week 8 |
|---|---|---|---|
| Waist | 36.0 in | 35.5 in | 35.0 in |
| Hips | 41.5 in | 41.25 in | 41.0 in |
| Chest | 39.0 in | 39.0 in | 38.75 in |
| Right upper arm | 12.5 in | 12.5 in | 12.5 in |
| Right thigh | 23.0 in | 22.75 in | 22.5 in |
| Weight (7-day average) | 172.4 lb | 171.0 lb | 170.2 lb |
In this example, the scale moved about 2 pounds in eight weeks, which might feel slow. The tape tells a fuller story: the waist is down an inch, the hips and thighs are down too, and the arms are holding steady.
If none of your numbers have moved after two months of consistent effort, review your plan. Our guides to how a calorie deficit works and how much protein you need are good places to start, and our belly fat guide covers the habits that shrink your waist.